Did you know that you can navigate the posts by swiping left and right?
Integrating Hubot with Grafana
21 Jun 2017
. category:
devops
.
Comments
#sysadmin
#devops
#hubot
#slack
#hubot-control
#bot
#slack-bot
#Grafana
From the previous post How to install Hubot-Control on Ubuntu Linux, we’ve created Hubot-control to help us configure and manage multiple Hubot instances using a web interface. And from post Integrating Hubot with Slack, we’ve integated our hubot with slack. Now, we start integrating our hubot with grafana which is one of the best open platform for analytics and monitoring.
Grafana 2.0 shipped with a great feature that enables it to render any graph or panel to a PNG image. No matter what data source you are using, the PNG image of the Graph will look the same as it does in your browser.
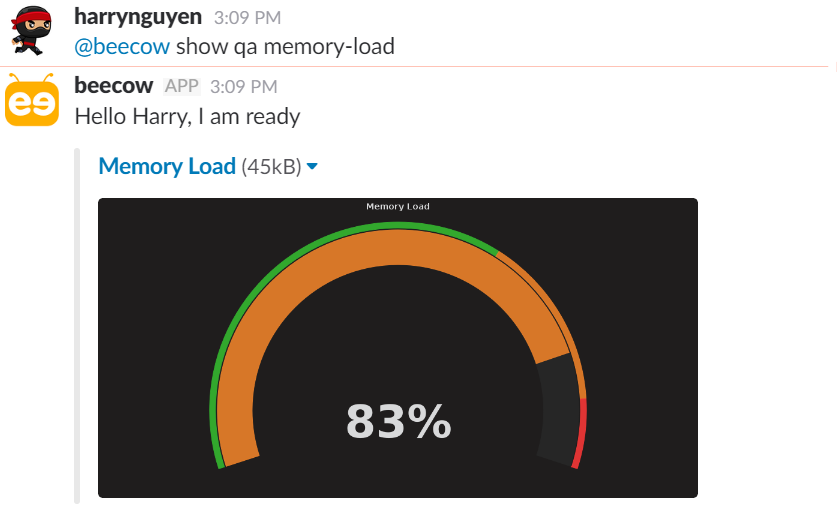
This guide will show you how to install and configure the Hubot-grafana plugin. This plugin allows you to tell hubot to render any dashboard or graph right from a channel in Slack. The bot will respond with an image of the graph and a link that will take you to the graph.
Amazon S3 Required: The hubot-grafana script will upload the rendered graphs to Amazon S3. This is so Slack can show them reliably (they require the image to be pulicly available)
Install hubot-grafana in our project:
$ npm install hubot-grafana --save
Edit the file external-scripts.json and add hubot-grafana to the list of plugins
[
....
"hubot-grafana"
....
]
Grafana server side rendering
The hubot plugin will take advantage of the Grafana server side rendering feature that can render any panel on the server using phantomjs. Grafana ships with a phantomjs binary (linux only).
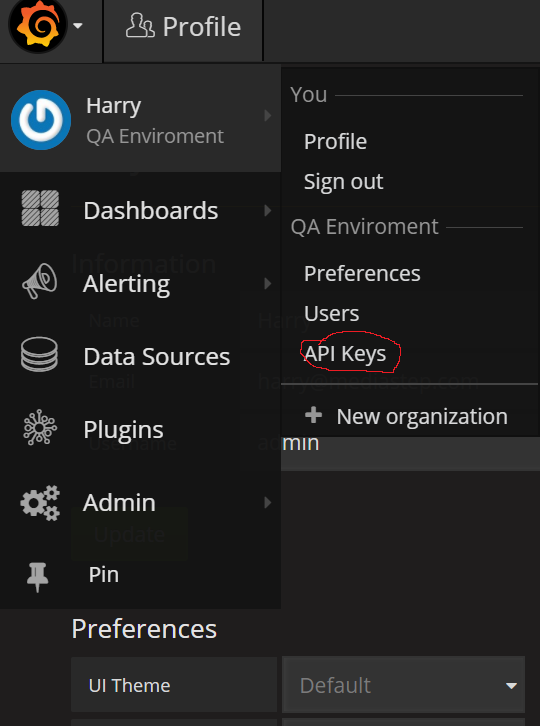
You need to set the environment variable Hubot_Grafana_API_KEY to a Grafana API key.
 Configure
The hubot-grafana plugin requires a number of environment variables to be set in order to work properly.
HUBOT_GRAFANA_HOST=http://urlofgrafanserver
HUBOT_GRAFANA_API_KEY=abcd01234deadbeef01234
HUBOT_GRAFANA_S3_BUCKET=mybucket
HUBOT_GRAFANA_S3_ACCESS_KEY_ID=ABCDEF123456XYZ
HUBOT_GRAFANA_S3_SECRET_ACCESS_KEY=aBcD01234dEaDbEef01234
HUBOT_GRAFANA_S3_PREFIX=graphs
HUBOT_GRAFANA_S3_REGION=ap-southeast-1
Aliases
Some of the hubot commands above can lengthy and you might have to remember the dashboard slug (url id). If you have a few favorite graphs you want to be able check up on often (let’s say from your mobile) you can create hubot command aliases with the hubot script hubot-alias.
$ npm install hubot-alias --save
Now add hubot-alias to the list of plugins in external-scripts.json and restart hubot.
Now you can add an alias like this:


Enjoying! an make an amazing Chatbot.
